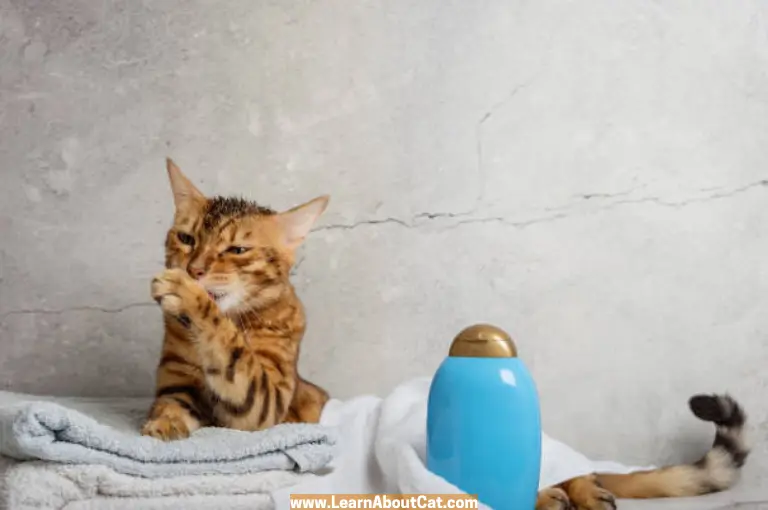
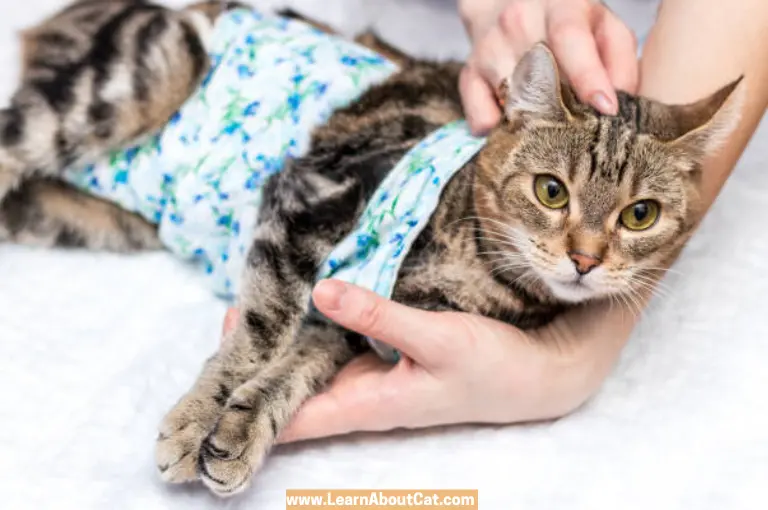
How to Make a DIY Cat Diaper? [Easy Guide]
If you’re a cat owner, you know that accidents can happen. Whether your cat is sick, recovering from surgery, or simply has trouble controlling their bladder, there are times when a diaper can come in handy. However, finding the right size and fit for your furry friend can be a challenge. That’s where DIY cat diapers come in.
Creating your own cat diaper can be a cost-effective and practical solution, which provides a convenient way to handle issues like incontinence, territorial marking, or cats recovering from surgery.
Not only can you customize the design and fit your cat’s specific needs, but you can also save money by using materials you already have at home
In this article, we will explore various DIY cat diaper options and offer step-by-step instructions to assist you in crafting your own. We will guide you through the process of making a comfortable and functional cat diaper tailored to your pet’s requirements.
DIY Cat Diapers
Cats are known for their independent nature, but there are situations when they require assistance with their bathroom habits. Whether it’s due to medical conditions, aging, or behavioral issues, cat diapers offer a viable solution for pet owners.
DIY cat diapers are an economical alternative to store-bought options, providing comfort and hygiene to both the cat and its surroundings.
Find Out: Can I Use My Glucose Meter For My Cat?[Answered]
Benefits of Using DIY Cat Diapers
Creating DIY cat diapers offers numerous benefits for both cats and their owners. Here are some advantages worth considering:
- Economical and Cost-Effective Making your own cat diapers is an affordable option compared to purchasing them from stores. By utilizing readily available materials and basic sewing skills, you can save money while ensuring your cat’s comfort and cleanliness.
- Customizable and Tailored Fit DIY cat diapers allow you to customize the diaper design to suit your cat’s specific needs and body shape. Unlike generic store-bought options, DIY cat diapers can be adjusted for a perfect fit, ensuring maximum comfort for your feline friend.
- Environmentally Friendly By opting for DIY cat diapers, you contribute to reducing waste and environmental impact. Store-bought disposable diapers generate significant amounts of non-biodegradable waste, whereas DIY cloth diapers can be washed and reused multiple times, minimizing their ecological footprint.
- Enhanced Absorbency DIY cat diapers can be customized with high-quality absorbent padding, offering superior leakage protection and keeping your cat dry and comfortable. You have the flexibility to choose materials that best suit your cat’s needs, ensuring optimal absorbency and preventing skin irritation.
How to Make a Cat Diaper Out of a Shirt: Step-by-Step Guide
To make a cat diaper out of a shirt, you’ll need a shirt that fits your cat snugly but comfortably, a pair of scissors, and some safety pins. The shirt should be long enough to cover your cat’s midsection and have enough fabric to wrap around its waist. You can use an old T-shirt or purchase a new one specifically for this purpose.
Material
To make a cat diaper out of a shirt, you will need a few materials. Here are the items you’ll need to gather before you get started:
Shirt
The first thing you’ll need is a shirt that fits your cat. You can use any type of shirt, as long as it fits your cat’s body well. A T-shirt or tank top works well, but you can also use a dress shirt or button-up shirt if you prefer.
Scissors
You’ll need a good pair of scissors to cut the shirt into the right shape and size for your cat’s diaper. Make sure your scissors are sharp and easy to handle.
Measuring Tape
To ensure that your cat’s diaper fits properly, you’ll need a measuring tape. This will help you measure your cat’s waist and determine the right size for the diaper.
Marker
Finally, you’ll need a marker to mark the spots where you’ll need to cut the shirt. A washable marker is best, as you can easily remove any marks that you make on the shirt.
Now that you have all the materials you need, you’re ready to get started on making your cat’s diaper.
Preparation
Before you start making a cat diaper out of a shirt, it’s essential to prepare the materials and tools you’ll need. This section will guide you through the preparation process, including cutting the shirt, measuring the cat, and marking the shirt.
Cutting the Shirt
The first step in making a cat diaper is cutting the shirt. You can use an old T-shirt or any soft fabric that’s comfortable for your cat. Cut the shirt horizontally just below the armpits to create a rectangular shape. Then, cut off the sleeves and discard them. You can use the remaining fabric to make the diaper.
Measuring the Cat
After cutting the shirt, you need to measure your cat to determine the size of the diaper. Measure your cat’s waist circumference just in front of its hind legs. Add an inch or two to this measurement to ensure a comfortable fit. Write down this measurement to use later when marking the shirt.
Marking the Shirt
Once you have the measurement, it’s time to mark the shirt. Lay the shirt flat on a table and fold it in half lengthwise. Use a pen or a marker to mark the center of the folded edge. Then, measure and mark the distance from the center to the left and right sides of the shirt, using the waist measurement you took earlier. These marks will indicate where you need to cut holes in your cat’s legs.
Next, mark the center of the bottom edge of the shirt. Use the waist measurement again to mark the distance from the center to the left and right sides of the shirt. These marks will guide you when folding the diaper around your cat.
Creating the Diaper
When making a cat diaper out of a shirt, you will need to create leg holes, and a tail hole, and secure the diaper on your furry friend. Here are the steps to follow:
Creating the Tail Hole
- Lay the shirt flat on a surface with the back facing up.
- Cut a small hole in the center of the back of the shirt for the tail. The hole should be big enough for your cat’s tail to fit through comfortably.
Creating the Leg Holes
- Cut two small holes on the bottom of the shirt where your cat’s back legs will go through. The holes should be about 1-2 inches apart from each other.
- Fold the shirt in half so that the leg holes line up with each other. Cut a straight line up the middle of the shirt, starting from the bottom of the shirt up to the center of the shirt.
- Cut a small curve from the center of the shirt to the top of the leg holes. This will create a flap that will fold over your cat’s legs.
Securing the Diaper – Testing and Adjustments
- Place the shirt on your cat with the tail hole over your cat’s tail and the leg holes around your cat’s back legs.
- Fold the flap over your cat’s legs and secure it with a safety pin (Be sure to use a fur-friendly fastener to avoid hurting your cat).
- Wrap the sleeves around your cat’s waist and pin them together with fur-friendly fasteners.
- Check the diaper frequently to make sure it’s not too tight, and adjust as necessary.
Creating a cat diaper out of a shirt is a great way to save money and provide comfort for your furry friend. With these easy steps, you can create a diaper that fits your cat perfectly.
Proper Usage and Care
When removing the diaper, carefully undo the safety pin and remove the diaper from the back legs first, followed by the front legs. Dispose of any waste in the diaper before washing.
To clean the diaper, wash it in cold water with mild detergent, and avoid using fabric softeners or bleach. Hang the diaper to air dry, and avoid using a dryer, as the heat can damage the elastic waistband.
How to Make a Cat Diaper Using a Sock: A Step-by-Step Guide
Materials
To make a cat diaper out of a sock, you will need a few materials. Here are the things you need to gather before starting:
Socks
The first thing you need is a sock. You can use any type of sock, but it is recommended to use a longer sock to ensure that it covers the cat’s belly. A tube sock or knee-high sock works well for this purpose. Make sure the sock is clean and free of holes.
Scissors
You will need a pair of scissors to cut the sock to the appropriate size and shape. Make sure the scissors are sharp and can cut through the fabric easily.
Measuring tape
A measuring tape is useful to ensure that the sock diaper fits your cat properly. Measure your cat’s waist and the distance between its legs to determine the size of the sock diaper you need to make.
Marker
A marker can be used to mark the sock before cutting it. This will help you cut the sock to the right size and shape.
Once you have gathered all the materials, you can start making the sock diaper for your cat. With these materials, you can create a comfortable and inexpensive diaper for your furry friend.
Preparation
Before making a cat diaper out of a sock, it is important to prepare the necessary materials and tools. In this section, we will go over the steps involved in preparing a sock for the diaper-making process.
Measuring the sock
The first step in preparing a sock for a cat diaper is to measure it. The sock should be large enough to fit around the cat’s waist comfortably, but not so large that it falls off or causes discomfort. To measure the sock, place it around the cat’s waist and mark where the sock overlaps.
Cutting the sock
Once the sock has been measured, it is time to cut it. Use a sharp pair of scissors to cut the sock along the marked line. Be sure to cut straight and evenly, as this will affect the fit of the diaper.
Marking the sock
After cutting the sock, it is important to mark it to ensure that the diaper will fit properly. First, mark the center of the sock by folding it in half and making a small cut at the center point. Next, mark two additional points on either side of the center point, about two inches apart. These will be used as reference points when attaching the diaper to the cat’s waist.
Assembling the Diaper
Once the sock is prepared, it’s time to assemble the diaper, ensuring a comfortable and secure fit for your cat. This entails creating appropriate openings for the tail and legs and conducting a fit test.
Creating the tail hole
To establish a tail opening, utilize a pair of scissors to delicately carve a small hole at the center of the sock. The hole should be adequately sized to allow the cat’s tail to pass through comfortably. Be cautious not to make it too large, as this could cause the diaper to slip off or become uncomfortable for the cat.
Creating the leg holes
Next, create two small holes on either side of the sock to accommodate the cat’s legs. These openings should be positioned near the sock’s base, ensuring a snug fit against the cat’s body. Again, take care to avoid making the holes too large, as this could lead to the diaper shifting or become uncomfortable for the cat.
Adding Velcro
When crafting a cat diaper from a sock, incorporating Velcro is a vital step to ensure its stability. Follow these steps to attach Velcro to your cat’s sock diaper effectively.
Attaching the Velcro
- Cut two small pieces of Velcro, one for each side of the sock diaper. The size of the Velcro pieces will depend on the dimensions of the sock and your cat.
- Sew one side of the Velcro to the inner part of the sock’s back, which will attach to the opposite side of the Velcro.
- Sew the other side of the Velcro to the outer part of the sock’s front, which will attach to the first side of the Velcro.
- Ensure proper alignment of the Velcro pieces before sewing them securely in place. You don’t want the Velcro to be too far apart or too close together.
- Use either a sewing machine or hand-sew the Velcro pieces to the sock. Ensure the stitches are tight and firm to prevent the Velcro from coming loose.
- Test the strength of the Velcro to confirm that it can adequately secure the sock diaper. If it proves insufficient, consider using a larger piece of Velcro or sew it in a different way
Testing the Diaper
After crafting the sock diaper for your cat, it’s essential to conduct a thorough testing process. Follow these steps to ensure the diaper fits appropriately and remains securely in place.
Fitting the Diaper on the Cat
Once the holes have been created, it’s time to evaluate the diaper’s fit. Gently position the diaper over the cat’s hindquarters, ensuring the tail passes through the tail opening and the legs through the leg openings. Verify that the diaper is centered, with the sock sleeves on either side of your cat’s legs.
Adjusting the Diaper
Once the diaper is in position, make any necessary adjustments to ensure a comfortable fit. Check that the diaper fits snugly but not too tightly around your cat’s waist. Additionally, you can modify the sock sleeves to ensure they do not exert excessive pressure on your cat’s legs.
If the diaper tends to slide or become loose, attempt to readjust it or use a safety pin to secure it in place. Be mindful to employ a cat-friendly fastener to prevent any harm to your feline companion.
Keep an eye on your cat while they wear the diaper to ensure their comfort and that the diaper remains in place. If your cat appears uneasy or the diaper keeps slipping off, consider adjusting the fit or exploring alternative diapering methods.
Alternatives to Using DIY Diapers on Cats
Cat Diapers: Specially designed cat diapers are available in various sizes. They are crafted from soft materials that are gentle on your cat’s skin and feature adjustable straps to ensure a secure and comfortable fit.

Belly Bands: Belly bands are another alternative to baby diapers for cats. These bands wrap around your cat’s belly, covering its genital area and preventing accidents. They come in different sizes and materials, such as cotton and fleece.
Litter Box Retraining: If your cat is experiencing bladder control issues, it may be helpful to retrain them to use the litter box. Provide a clean and comfortable litter box, and encourage regular use. Positive reinforcement techniques, such as treats and praise, can also be used to incentivize desired behavior.
Frequently Asked Questions
How often should I change the cat’s diaper?
The frequency of diaper changes depends on your cat’s needs and the absorbency of the diaper. However, it’s generally recommended to check and change the diaper every 2-3 hours or more frequently if it becomes soiled.
Can I reuse the sock diaper?
Sock diapers made from washable materials can be reused after proper cleaning. However, it’s essential to check for any damage or wear and ensure it’s hygienic for your cat.
What if my cat keeps removing the diaper?
If your cat keeps removing the diaper, it might be uncomfortable or too loose. Ensure the diaper fits properly and consider using a snug-fitting belly band or consulting with a veterinarian for additional suggestions.
Are DIY cat diapers machine-washable?
Yes, DIY cat diapers made from washable fabric can be machine-washed. Follow the manufacturer’s instructions or use a gentle cycle with mild detergent to clean them.
How long can a cat wear a diaper?
The duration a cat can wear a diaper depends on various factors such as the cat’s size, age, and activity level, as well as the diaper’s absorbency.
Disposable diapers: These should be changed every 2-3 hours or more frequently if they become wet or soiled.
Reusable diapers: These can be changed every 3-5 hours or more often if they become wet or soiled.
Washable diapers: These can be changed every 4-6 hours or more frequently if they become wet or soiled.
Can I use DIY cat diapers for outdoor cats?
DIY cat diapers are primarily designed for indoor cats or cats that require close supervision. For outdoor cats, it may be more challenging to manage diaper changes and ensure their safety
Conclusion
DIY cat diapers provide a practical and cost-effective solution for managing various challenges related to a cat’s bathroom habits. By creating custom-fit diapers using absorbent padding, soft fabric, and secure closures, you can maintain cleanliness, protect furniture and floors, and ensure your cat’s comfort and dignity.
Remember to introduce the diapers gradually, monitor for fit and comfort, and follow proper usage and maintenance tips for the best results. With DIY cat diapers, you can confidently address incontinence, territorial marking, and other issues, creating a harmonious environment for both you and your feline companion.

Who is Isabella?
My name is Isabella, and I am a dedicated and knowledgeable cat enthusiast. With years of experience caring for cats and a deep love for felines, I made a mission to help other cat lovers navigate the challenges of cat ownership.